

Best Arthritis-Friendly Kitchen Tools for Weak Hands: 11 Adaptive Gadgets That Reduce Joint Pain
Disclosure: AgeFolk is supported by our readers. When you buy through links on our site, we may earn an affiliate commission at no additional cost to you. Learn more
Swapping everyday items for the right kitchen tools for weak hands eliminates joint pain. Trembling hands or throbbing finger joints can turn simple kitchen tasks into risky ones. Twisting a jar lid, chopping an onion, or lifting a can’s pull-tab all demand the pinch strength, grip force, and wrist rotation that arthritis takes away first.
The risks are real: dropped knives, spilled boiling water, and strained joints that stay sore for days. The fix isn’t to cook less. It is to swap high-strain tools for adaptive ones that rely on leverage, body weight, and stable surfaces instead of pure finger strength.
This guide covers 11 essential adaptive tools across four critical categories: opening, cutting, stabilizing, and cooking/pouring. It wraps up with a practical buyer’s checklist and answers to common kitchen arthritis questions.
Table of Contents
✅ Quick Answer: What Makes a Kitchen Tool Arthritis-Friendly?
An arthritis-friendly kitchen tool relies on four core design traits:
- Zero-twist mechanics: Works through pressing, pulling, tipping, or levering rather than wrist rotation.
- Thick, non-slip grips: Wide, cushioned handles spread pressure across the whole palm instead of concentrating force on small finger joints.
- Mechanical leverage: The tool, a countertop, or your body weight absorbs the mechanical workload.
- Lightweight materials: Food-grade plastic, silicone, and balanced aluminum minimize fatigue and drop risks.
Quick Comparison: Top 11 Adaptive Kitchen Tools
| # | Tool Category | Top Feature | Primary Benefit for Weak Hands |
| 1 | Under-cabinet lid opener | V-shaped, fixed grip teeth | Opens jars one-handed with no finger squeezing |
| 2 | Automatic can opener | One-touch, hands-free cutting | Eliminates squeeze-and-crank motion |
| 3 | Ring-pull can tab helper | Lever-style hook | Lifts tabs without fingernail or fingertip pressure |
| 4 | T-handle rocker knife | Ergonomic horizontal handle | Cuts with a rocking press, not repeated slicing |
| 5 | Press-style grid chopper | Palm-pressure cubing with catch tray | Dices vegetables in a single downward push |
| 6 | Wide-handle Y-peeler | Cushioned, thick non-slip grip | Reduces pinch force on finger joints |
| 7 | Adaptive prep board | Corner guards and food spikes | Holds food still so one hand cuts safely |
| 8 | Silicone non-slip grip mats | High-friction surface | Keeps bowls and boards steady without gripping |
| 9 | Lightweight cookware with helper handles | Dual balanced handles | Shares weight across both hands |
| 10 | Automatic gravity grinders | Invert-to-grind sensor | Eliminates two-handed twisting |
| 11 | Cordless kettle tipper or water dispenser | Tilt or push-button pouring | Pours hot water without lifting a heavy kettle |
Essential Jar & Can Openers: Eliminate Twisting Strain
Breaking the vacuum seal on a jar or bottle is the number-one kitchen pain point for people with arthritis. It demands grip, pinch, and wrist rotation simultaneously—the exact combination of motions inflamed joints handle worst. While manual pull-tab tools help with beverage rings, switching to a dedicated electric can opener designed for weak hands removes all pinching pressure when preparing canned foods.
Tool 1: Under-Cabinet Mounted Lid Opener (V-Shaped Grip)
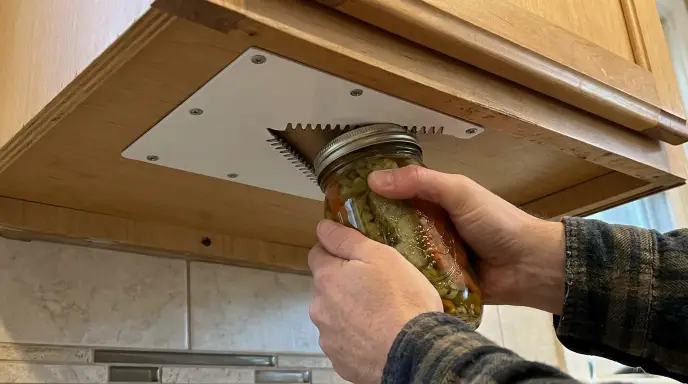
This opener screws directly to the underside of a cabinet or shelf. A proven option like the EZ Off Under Cabinet Jar Opener allows you to slide the jar lid into its dual V-shaped teeth and rotate the base of the jar, not the lid.
- Why it works: The lid is secured by fixed teeth, completely removing finger squeezing from the equation. The rotational force comes from your arm and shoulder, with the cabinet structure providing counter-leverage.
- Buying tip: Look for dual stainless-steel teeth and a metal mounting plate. Ensure you have adequate vertical clearance between the counter and cabinet for tall jars.
Once your cabinets open smoothly with ergonomic D-pulls (see our guide on cabinet pulls for arthritic hands), stock them with tools that protect your finger joints, starting with this mounted aid.
Tool 2: Automatic One-Touch Hands-Free Can Opener
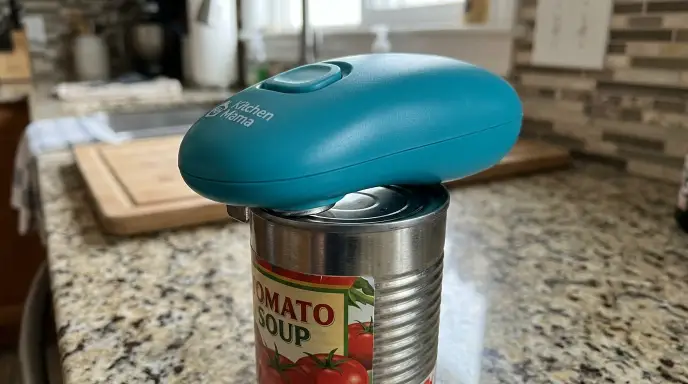
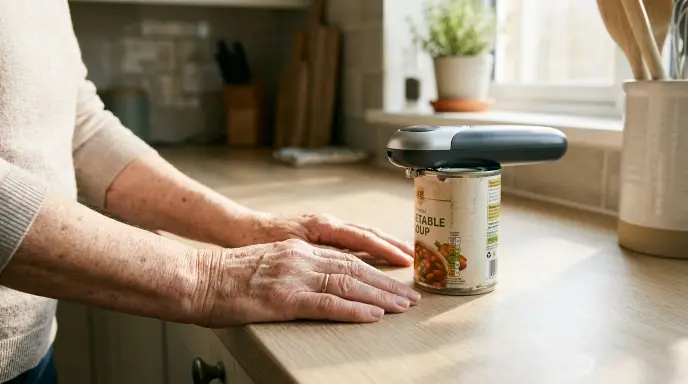
Place this unit directly on top of the can rim, press the button once, and release. The motor walks around the rim independently, while an integrated magnet captures the lid. An industry standard like the Kitchen Mama Auto Electric Can Opener sits directly on the rim and starts with a single palm press
Tool 3: Ring-Pull Can Tab Helper (J-Popper Tool)
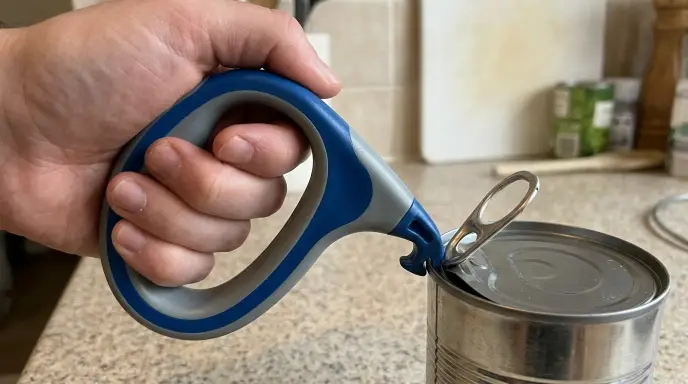
This hooked lever slips underneath a pull-tab ring. Pulling the elongated handle backward pops the seal and rolls the lid open. A purpose-built tool like the Dext Ring Pull Can Opener slips under the pull-tab ring so you can roll the lid back using your whole hand instead of painful fingertips
- Why it works: Lifting tabs normally requires a painful fingertip pinch. This tool converts that high-strain pinch into a broad lever pull powered by your entire hand.
- Buying tip: Choose a model with a thick, contoured handle or a wide loop grip that accommodates limited finger flex.
Safe Cutting, Peeling & Chopping Tools
Holding a conventional chef’s knife and slicing repeatedly causes rapid fatigue, wrist ache, and dangerous slips. These tools shift the burden from fine motor pinch grips to palm pressure and balanced downward leverage.
Tool 4: Ergonomic T-Handle Rocker Knife
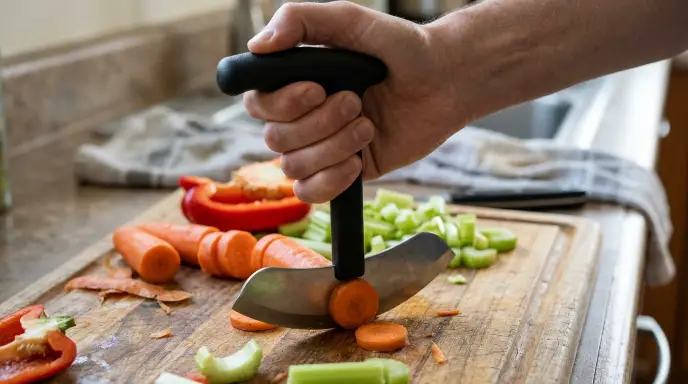
A rocker knife features a curved blade with a handle positioned directly above the cutting edge. You place your palm on top and roll the blade through food. An adaptive option like the Big Grip T-Handle Rocker Knife places the handle directly above the blade, allowing you to cut with downward palm pressure and a simple rocking motion instead of slicing back and forth. While lightweight peelers and multi-openers reduce general joint fatigue, meal preparation often requires swapping traditional straight-handled blades for specialized adaptive knives and ergonomic cutting boards that keep your wrist neutral.
- Why it works: Cutting becomes a vertical, rocking press rather than a repetitive horizontal slice. Your wrist stays locked in a neutral position while your forearm and shoulder supply the power.
- Safety note: The blade is extremely sharp. Always use it with a secured cutting board (see Tools 7 and 8).
Tool 5: Press-Style Grid Vegetable Chopper with Catch Container
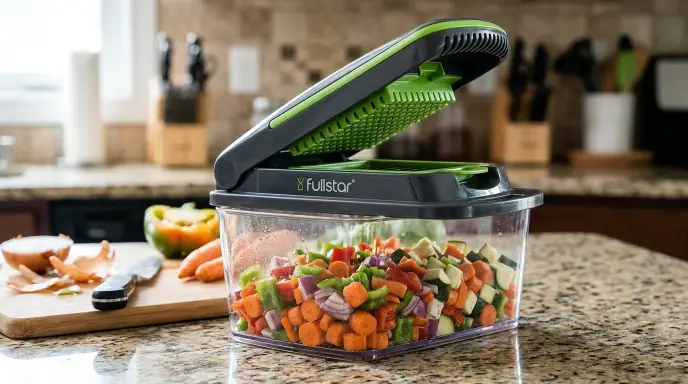
Place half an onion or potato on the cutting grid, close the top lid, and press down with the base of your palm. The food shears through the grid directly into a clear storage base. A dependable option like the Fullstar Pro Vegetable Chopper uses a wide lever lid, allowing you to dice onions and vegetables in one downward press using your palm instead of straining weak finger joints.
- Why it works: It swaps dozens of taxing knife chops for a single downward push. The catch tray also prevents slippery food pieces from scattering across countertops.
- Buying tip: Look for a broad, flat pressing plate and a reinforced non-skid rubber base.
Tool 6: Wide-Handle Non-Slip Y-Peeler (Cushioned Grip)
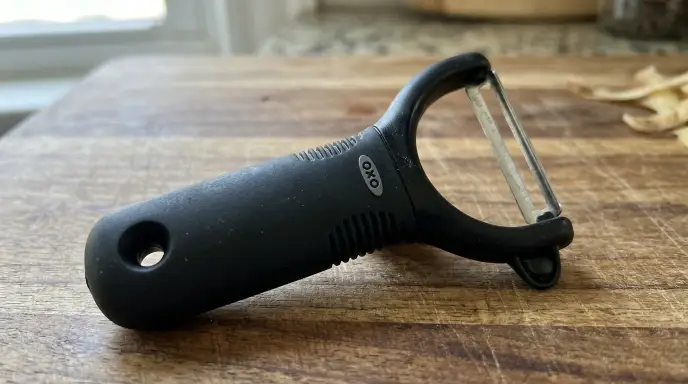
A gold-standard option like the OXO Good Grips Y-Peeler features an oversized, cushioned handle that significantly reduces pinch force on your finger joints while offering smooth peeling control. Y-peelers feature a horizontal blade mounted across the top of a wide handle, offering vastly superior directional control compared to swivel peelers.
- Why it works: A built-up handle diameter significantly reduces the muscle contraction needed to hold the tool. Pressure is distributed evenly across your palm rather than pinpointing on individual joint capsules.
- Buying tip: Prioritize soft, textured elastomeric handles (such as Santoprene) that maintain non-slip traction even when wet.
Prep Workstation & Stability Aids
A major source of kitchen strain comes from steadying slippery food rather than the cutting itself. When an apple or potato rolls, you instinctively squeeze harder—and that sudden pinch causes pain.
Tool 7: Adaptive Kitchen Prep Board with Corner Guards & Food Spikes
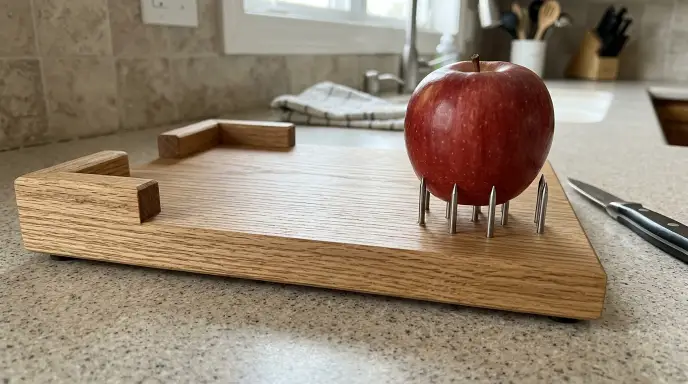
A dedicated option like the Adaptive One-Handed Cutting Board with Stainless Steel Spikes features raised corner guards to brace items and durable spikes to hold apples or potatoes firmly in place while slicing. These specialized boards feature raised corner rims to hold bread in place and stainless-steel spikes that secure vegetables upright.
- Why it works: Food items remain locked in place so you can peel or slice one-handed without risking a blade slip.
- Safety note: The spikes are rigid and sharp. Choose boards with protective safety caps for storage when not in use.
Tool 8: Heavy-Duty Silicone Non-Slip Grip Mats (Dycem-Style)
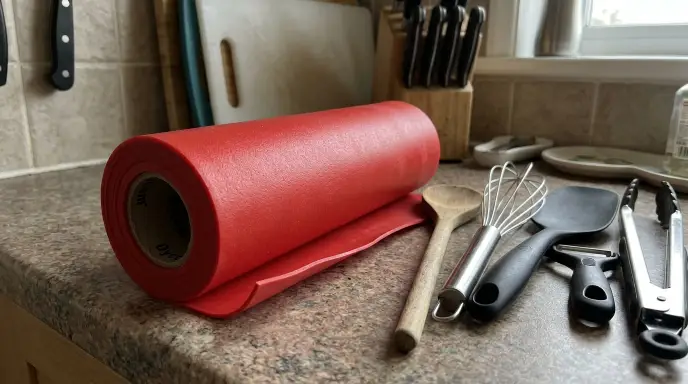
A trusted brand like the Dycem Non-Slip Material Roll creates a high-friction surface that grips both the counter and your bowls or boards, so nothing slides around while you prepare meals. These ultra-thin, high-friction mats stick firmly to clean surfaces without adhesives, creating an unyielding grip zone.
- Why it works: Placing a mat under mixing bowls, plates, or chopping boards locks them to the counter, eliminating the need to brace items with an aching secondary hand.
- Buying tip: Buy a roll you can cut down to custom drawer, tray, and counter sizes. Rinse periodically with soapy water, as dust and grease reduce surface friction.
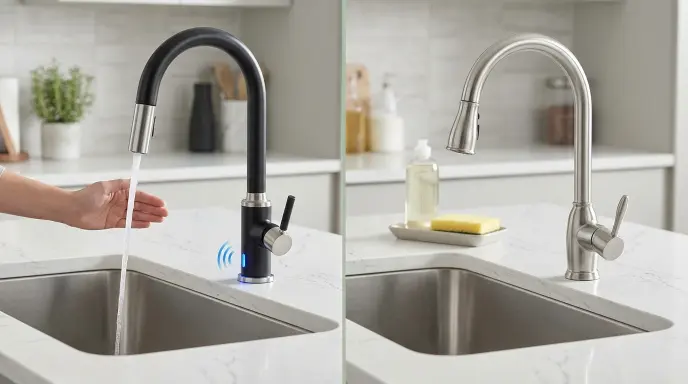
Kitchen maintenance matters just as much as preparation. Pairing these tools with a touchless or long-lever faucet makes cleanup painless on sore hands. See our comparison of touchless vs. lever faucets with anti-scald protection.
Cooking, Pouring & Heavy Lifting Support
Lifting hot, filled cookware adds scalding hazards to mechanical joint pain. Weak grips turn standard cooking routines into severe spill risks; the goal is weight distribution and controlled movement.
Tool 9: Lightweight Cookware with Double “Helper” Handles
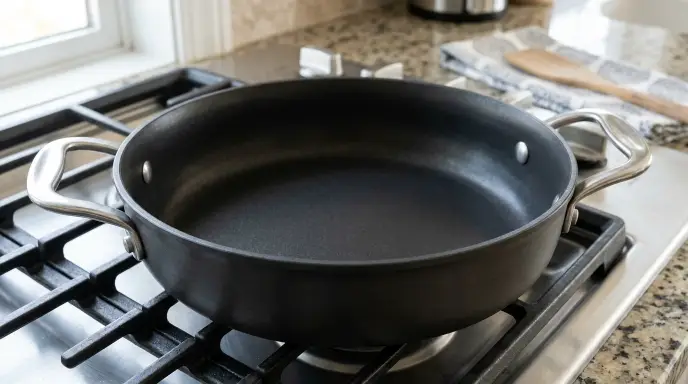
A well-balanced choice like the Cooks Standard Hard-Anodized Everyday Pan features dual loop handles that distribute weight evenly across both wrists, completely avoiding the strain of heavy single-handle pans. Select pots, Dutch ovens, and sauté pans are constructed from hard-anodized aluminum that feature an auxiliary “helper handle” directly opposite the primary handle.
- Why it works: Two wide handles split the load across both wrists, shoulders, and arms, preventing single-wrist strain and dropping. Helper handles are especially helpful when maneuvering cookware safely across burners; see our dedicated guide to stove safety for seniors.
- Buying tip: Skip heavy cast iron. Ensure handle openings are wide enough to accommodate heat-resistant silicone grips or oven mitts comfortably.
Tool 10: Automatic Gravity Salt & Pepper Grinders
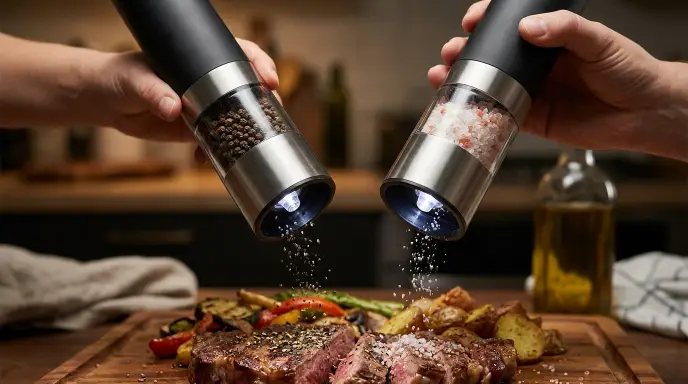
A dependable option like the CIRCLE JOY Gravity Electric Salt and Pepper Grinder Set automatically activates with a simple tilt, eliminating painful two-handed twisting while keeping daily seasoning effortless. These battery-powered or rechargeable mills automatically trigger their ceramic grinding mechanisms the moment you tilt them upside down.
- Why it works: Manual mills demand an aggressive two-handed twisting motion. Gravity mills operate via effortless angle tipping.
- Buying tip: Select wide-bodied mills with visible acrylic windows and large top-fill ports for mess-free refilling.
Tool 11: Electric Cordless Water Dispenser / Kettle Tipper
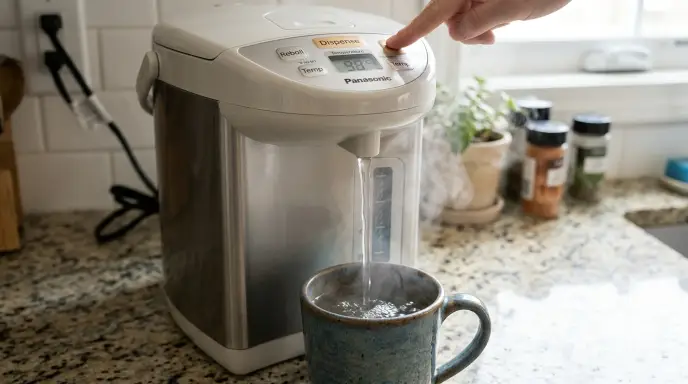
A push-button countertop option like the Panasonic Hot Water Dispenser eliminates the need to lift a full kettle of boiling water—simply place your mug underneath and press the dispense button for a steady, controlled pour. A kettle tipper is a sturdy wireframe cradle that allows you to pour boiling water by gently angling the kettle without ever bearing its weight. Alternatively, countertop push-button hot water dispensers deliver instant boiling water on demand.
- Why it works: You eliminate the high-risk task of lifting and balancing a full, scalding kettle over a mug.
- Buying tip: Look for wide, anti-tip rubberized feet and automatic shut-off safety locks.
Practical Buyer’s Checklist: How to Choose Tools for Weak Hands
Run prospective kitchen purchases through this six-point functional checklist before buying:
- Weight vs. Structural Rigidity: Avoid solid iron and thick gauge steel. Prioritize reinforced food-grade polymers, silicone, and hollow or aluminum cores that balance structural strength with featherlight handling.
- Mechanical Advantage: Does the mechanism harness body weight, leverage, or gravity? Tipping, rolling, pulling, and pressing mechanisms consistently outperform pinching and twisting motions.
- Handle Geometry: Seek out contoured, wide-diameter handles (at least 1.25 to 1.5 inches thick) with tactile non-slip ribbing.
- Maintenance Simplicity: Scrubbing intricate gadgets strains inflamed knuckles. Confirm that food-contact parts are 100% dishwasher-safe and disassemble without tight twists.
- Stability and Grip: Look for integrated suction cups, rubberized feet, and broad contact footprints that resist sliding.
- Built-in Safety Redundancies: Prioritize recessed blades, automatic blade shields, magnetic lid lifters, and thermal auto-shutoff features.
For a broader evaluation of barrier-free home kitchen modifications, explore our foundational aging-in-place kitchen guide.
Frequently Asked Questions
Can seniors with severe arthritis safely use sharp knives in the kitchen?
Yes, provided standard chef knives are replaced with adaptive designs. Ergonomic rocker knives, press-style cubers, and spiked prep boards eliminate the need for dangerous pinch grips and heavy downward hacking. Keeping cutting edges sharp is critical—dull blades require twice the force to cut, dramatically increasing slip hazards. If severe tremors or sudden muscle dropouts occur, utilizing pre-cut produce or a tabletop electric food processor is the safest path.
Are electric jar openers better than under-cabinet manual grippers?
It depends on upper-body mobility. Under-cabinet V-grippers cost less, require no charging or counter space, and last indefinitely, but they do require gross motor leverage from your arm and shoulder. Motorized hands-free openers require zero physical strength, but they take up drawer space, need periodic charging or battery changes, and struggle with odd-shaped or oversized jar lids. If you experience shoulder or elbow pain alongside hand weakness, choose electric.
What is the best way to open vacuum-sealed jars with zero hand strength?
Break the vacuum seal first before attempting to rotate the lid. Slide the dull tip of a butter knife or the flat hook of a bottle opener under the rim of the lid and gently pry outward until you hear the vacuum release (“pop”). Once the pressure equalizes, place a silicone grip pad over the lid or use an under-cabinet gripper; the lid will twist off with minimal effort.
Final Thoughts
Adapting your kitchen does not require an expensive overnight remodel. Start by targeting your most frustrating daily barriers—which for most people with arthritis are vacuum seals, bottle tops, and pull-tabs (Tools 1 to 3). From there, incorporate stability aids like non-slip mats and spiked prep boards to create a secure, hazard-free prep zone before upgrading your cutting and cooking equipment.
By replacing fine-finger strain with mechanical leverage and smart ergonomics, daily meal preparation remains an enjoyable, pain-free part of living independently at home. While ergonomic knives and adaptive peelers reduce repetitive cutting strain, breaking factory vacuum seals requires dedicated mechanical leverage. If opening canned foods or glass containers causes knuckle inflammation, equip your prep station with dedicated jar openers for arthritic hands that eliminate painful manual twisting entirely.
Disclaimer: This article is for informational purposes only and does not constitute medical advice or physical therapy diagnosis. Always consult with your physician or an occupational therapist to tailor home adaptations to your specific physical needs.





9 Comments