
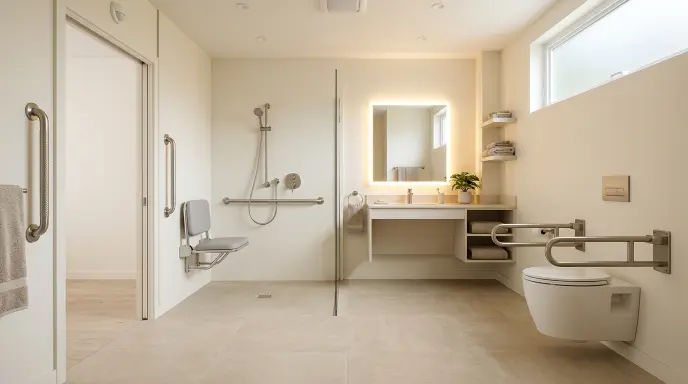
The Complete Senior Bathroom Safety Checklist: Step-by-Step Home Audit (Free Printable PDF)
A senior bathroom safety checklist is a step-by-step home inspection framework designed to audit and eliminate fall hazards across five core zones: entryways, flooring, toilets, tubs/showers, and emergency response points. Because nearly 80% of senior falls occur during rapid balance transitions—such as stepping over a tub curb or standing up from a low commode—this audit prioritizes high-friction flooring, stud-mounted grab bars, Comfort-Height seating, and clear pathways.
Use the quick-reference audit summary below, or download our printable single-page PDF to inspect your fixtures directly.
At-a-Glance: The 5-Zone Bathroom Safety Audit
| Bathroom Zone | Critical Hazard to Inspect | Immediate High-Priority Fix |
| 1. Entry & Lighting | Dark hallway pathways and narrow door frames | Plug-in motion-sensor LED night lights & lever door latches |
| 2. Floor Traction | Slick tiles and loose bath mats with curled edges | Low-profile rubber-backed non-skid runners |
| 3. Toilet & Vanity | Low 14″ seat height forcing strained stand-ups | ADA 17″–19″ raised seat or free-standing safety rails |
| 4. Tub & Shower | Stepping over 15″ curbs onto wet, soapy tile | Stud-mounted grab bars & a padded tub transfer bench |
| 5. Emergency Alert | Inability to call for assistance after slipping | Floor-level pull cords or waterproof wearable alert pagers |
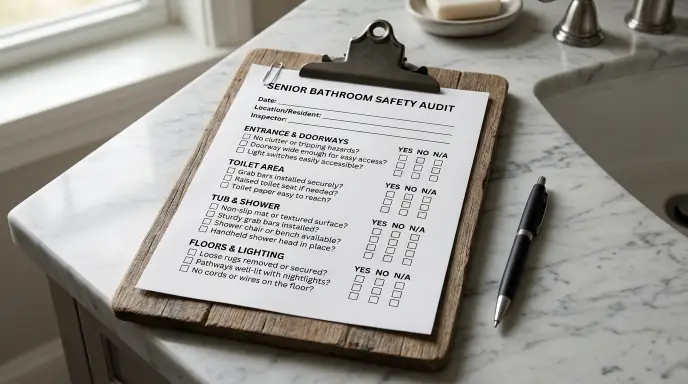
📥 Download Your Free Inspection Sheet
The 1-Page Senior Bathroom Safety Checklist (Printable PDF Audit)
- Standard Print Format: Clean single-page US Letter / A4 design with zero ink-heavy backgrounds.
- Audit Scope: 18 hands-on checkpoints across all 5 danger zones.
- Inspection Protocol: Physical push, pull, and traction testing criteria.
👉 Download The Free Printable Bathroom Safety Checklist (PDF)
(Print this sheet, grab a clipboard and pen, and physically test each fixture using the steps below.)
Table of Contents
How to Conduct This Physical Safety Audit
Do not simply stand in the doorway and visually scan the room. Many fixtures that appear secure from a distance fail immediately under dynamic body weight.
- Push and pull everything: Firmly rattle existing towel racks, sink rims, and bars. If an item wobbles under moderate hand pressure, it cannot arrest a sudden 150+ lb fall.
- Test bare-foot friction: Moisten a small patch of floor and step on it with bare feet to feel true slip resistance.
- Simulate low-light entry: Turn off the overhead lights at night to evaluate real pathway visibility.
Step 1: Entryway, Door Clearance & Lighting Audit
Before reaching the shower or toilet, the transition through the doorway itself presents hazards, particularly if an emergency occurs behind a locked door.
Inspection Checklist:
- Door Width: Is the door frame opening at least 32 inches wide (ideally 36 inches) to allow unobstructed clearance for a walker, wheelchair, or transport chair?
- Emergency Hardware: Can the door be unlocked from the outside during a medical event, and does it feature an ADA-compliant lever latch rather than a round, hard-to-grip doorknob? (Learn more: Bathroom Door Emergency Access for Seniors)
- Nighttime Pathway Illumination: Is there a continuous, glare-free light path from the bedroom into the bathroom operating on an automatic dusk-to-dawn or motion sensor? (Explore: Bathroom Lighting for Aging Eyes)
- Threshold Level: Is the transition threshold between the hallway flooring and bathroom tile flat and flush (less than 1/2 inch) to prevent toe-stub tripping?
🛒 Recommended Fix: Automatic Pathway Illumination
Product Pick: Plug-In Ultra-Slim LED Motion-Sensor Night Lights (Warm White, 2-Pack)
- Key Specs: 2700K warm white (prevents glare on aging eyes), dusk-to-dawn ambient sensor with 15-foot motion detection, low-profile design that keeps the second outlet clear.
- Why It Matters: Aging retinas require three times more light to register environmental depth. This eliminates walking into a pitch-black bathroom at 2:00 AM.→ Check Price & Reviews on Amazon
Step 2: Floor Traction & Slip Hazard Inspection
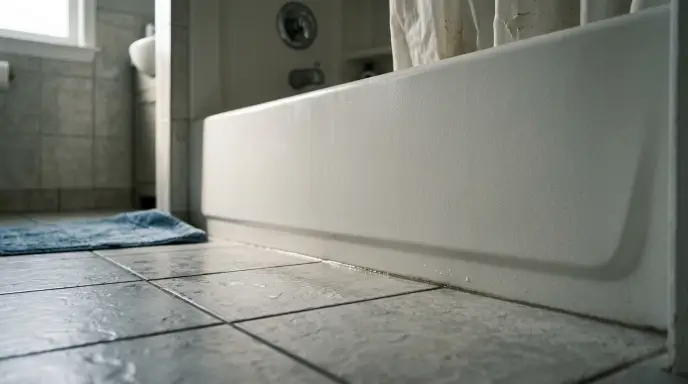
Bathroom tile turns exceptionally slick when coated with a thin layer of soap scum and standing water. Ordinary floor rugs are often secondary trip hazards rather than safety devices.
Inspection Checklist:
- Rug Backing Integrity: Are all bath mats backed with a heavy-duty, vulcanized rubber non-skid backing, with zero curled edges or loose corners? (Check our guide: Bathroom Rugs for Seniors)
- Floor Surface Grip: Does the tile provide tactile slip resistance when damp, or does it become glassy and slick? (Read: Slippery Bathroom Floor: Elderly Safety Fixes and Safest Bathroom Flooring for Seniors)
- Drainage & Water Retention: Does water pool outside the shower pan or accumulate around the base of the toilet after use? (See: How to Stop Water Pooling on Bathroom Floors and How to Keep Bathroom Floors Dry After a Shower)
🛒 Recommended Fix: Low-Profile Slip Prevention
Product Pick: Ultra-Thin Rubber-Backed Non-Slip Microfiber Bath Runner (Machine Washable)
- Key Specs: 0.25-inch ultra-thin pile (eliminates trip edges for walker wheels), textured TP-rubber backing, open-cell rapid-dry construction.
- Why It Matters: Thick plush mats bunch up under shuffling feet or cane tips. A low-clearance rubber runner stays planted firmly against the subfloor.→ View Top-Rated Anti-Slip Runners
Step 3: Toilet & Vanity Area Stability Audit
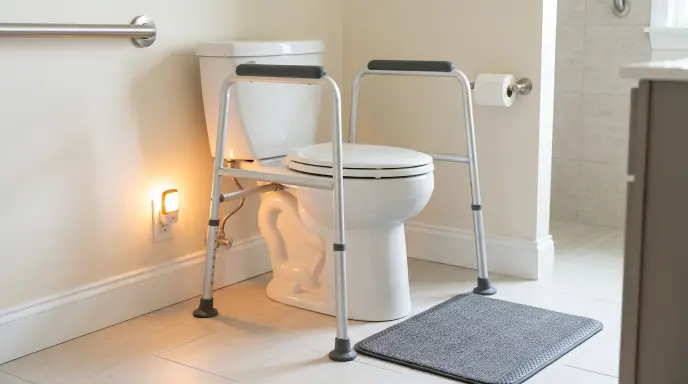
The biomechanical transition from sitting to standing creates rapid blood pressure changes and requires significant quadriceps and core strength.
Inspection Checklist:
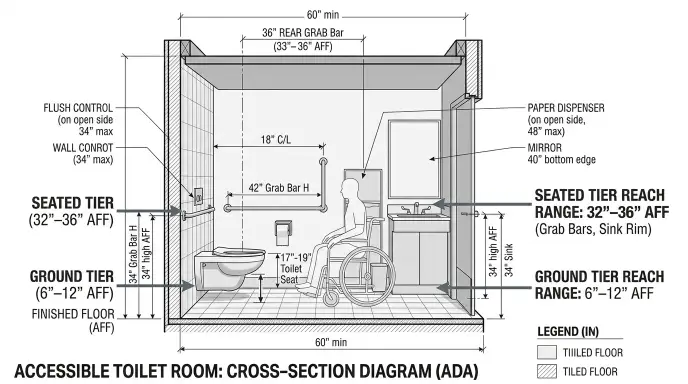
- Seat Height: Does the toilet seat rest at Comfort Height (17 to 19 inches from floor to seat crown) rather than standard residential height (14 to 15 inches)?
- Dedicated Sit-to-Stand Support: Are there heavy-duty, frame-mounted safety rails or nearby wall-mounted grab bars to bear weight during transfers? (Evaluate: Toilet Safety Rails vs. Raised Toilet Seats)
- Hygienic Reach Reduction: Is an ergonomic bidet installed to reduce back twisting and balance loss during personal cleaning? (Guides: Best Bidet Attachments for Seniors and How to Wipe with Arthritis or Limited Mobility)
- Sink Vanity Anchorage: Is the vanity cabinet securely fastened to the wall studs, and does the faucet feature easy-turn single levers? (Inspect: Bathroom Sink Vanity Safety for Seniors and Best Bathroom Faucets for Seniors)
🛒 Recommended Fix: Toilet Stability & Hygiene Upgrades
Product Pick 1: Free-Standing Adjustable Toilet Safety Frame
- Key Specs: 300 lb weight capacity, tool-free width adjustment (20″ to 25″), padded closed-cell foam armrests, anti-slip rubber suction feet. Check price on Amazon For Safety Frame
Product Pick 2: Dual-Nozzle Non-Electric Bidet Attachment
- Key Specs: Slim profile internal brass valves, smooth dial pressure control, targeted self-cleaning posterior and feminine wash modes.→ Check Deals on Toilet Safety Assist Gear
Step 4: Shower & Bathtub Audit (The High-Risk Zone)
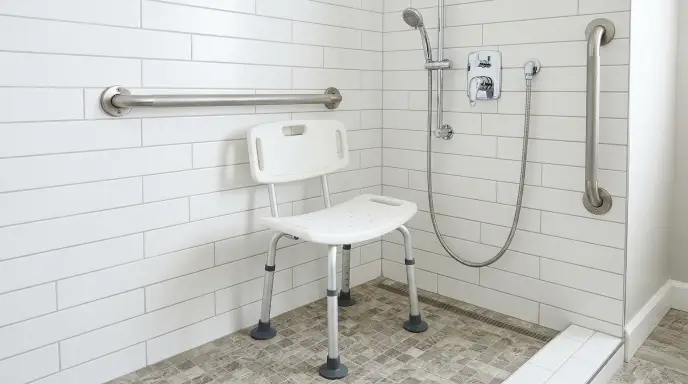
The combination of an elevated curb step, wet surfaces, hot water, and standing balance demands makes the shower and tub enclosure the single most critical fall zone.
Inspection Checklist:
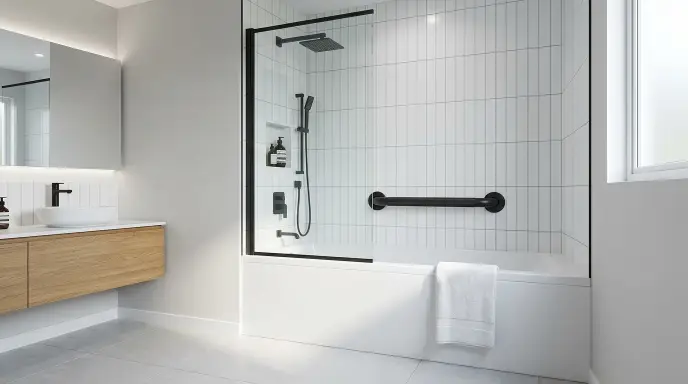
- Wall-Stud Anchorage: Are there at least two ADA-compliant grab bars secured directly into wall studs with structural screws (rated for 250+ lbs), rather than temporary suction attachments? (Review: Grab Bar Placement Guide for Seniors and Walk-In Shower Grab Bar Placement)
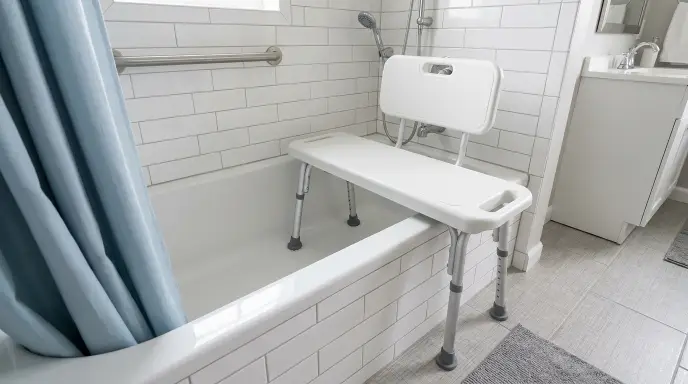
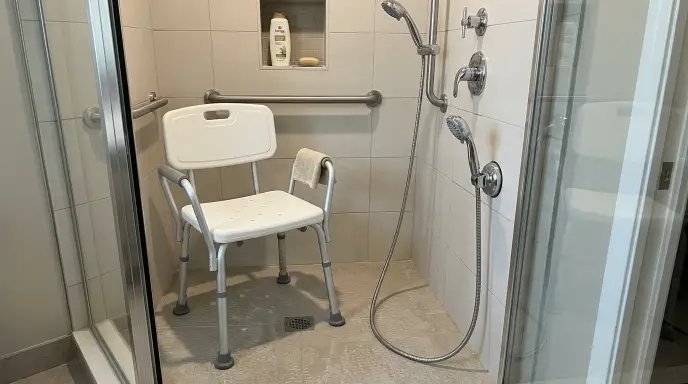
- Seated Bathing Station: Is there a stable shower chair or transfer bench with drainage slots and slip-resistant rubber feet installed to eliminate prolonged standing? (See: Shower Chair vs. Transfer Bench for Bathtubs, How to Use a Tub Transfer Bench Safely, and How to Stop a Shower Chair from Slipping)
- Handheld Spray Wand: Is there a handheld shower head mounted at seated height featuring a thumb-activated pause or shut-off button? (Setup: Handheld Shower Head Setup for Seniors)
- Scald & Burn Prevention: Is an anti-scald pressure-balancing valve installed and set to a maximum output of 120°F (49°C)? (Guide: Anti-Scald Valves for Seniors)
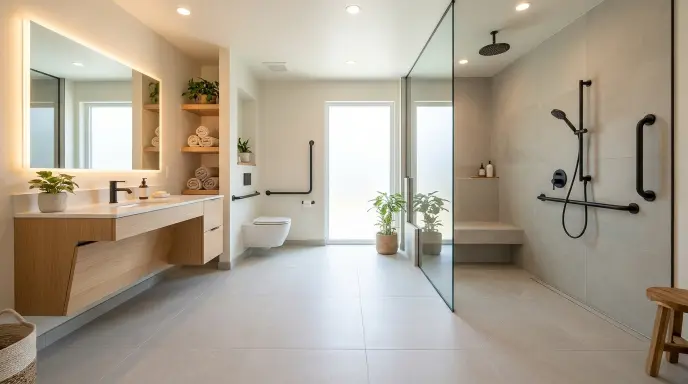
- Enclosure Entry: Does the shower feature an accessible curb or barrier-free threshold, or is there a safe strategy for clearing high tub walls? (Compare: Curbless vs. Low-Curb Showers, Walk-In Tub vs. Walk-In Shower, and Safe High-Step Bathtub Entry Without Remodeling)
- Safe Door Clearances: Are lightweight shower curtains installed in place of heavy, track-mounted sliding glass doors that can shatter or block emergency transfers? (Read: Glass Shower Doors vs. Curtains for Senior Safety)
🛒 Recommended Fix: Bathing Stability & Hardware Kit
Product Pick 1: Heavy-Duty Padded Tub Transfer Bench
- Key Specs: 400 lb load capacity, tool-free reversible backrest, non-slip textured EVA foam padding, oversized suction feet for wet tub basins. Check price on Amazon for Heavy-Duty Padded Tub Transfer Bench
Product Pick 2: Moen ADA Stainless Steel Concealed Screw Grab Bar (16-Inch & 24-Inch)
- Key Specs: 1.25-inch outer diameter, knurled anti-slip finger grip texture, 500 lb tensile pull rating when driven into structural wall studs. Check price on Amazon for ADA Stainless Steel Concealed Screw Grab Bar
Product Pick 3: Handheld Shower Head with 84-Inch Hose and Pause Switch
- Key Specs: Extra-long stainless steel flexible hose, ergonomic non-slip handle, instant push-button water flow pause for seated lathering.→ View Certified Aging-in-Place Shower Hardware
Check existing shower handles regularly. If you are currently using suction models, check our guide on suction vs screw-in grab bars to see if an upgrade to stud-mounted bars is needed.
Step 5: Emergency Alert & Response Readiness
Environmental adaptations substantially decrease fall risks, but having a dependable communication protocol in place ensures immediate response if an accident occurs.
Inspection Checklist:
- Low-Level Emergency Pull-Cords / Call Buttons: Is there an alert transmitter positioned within 6 to 12 inches of the floor near the toilet and shower base so it can be triggered from a seated or grounded position? (Placement: Bathroom Fall Alert Placement Guide)
- Waterproof Wearables: Does the senior wear a 100% waterproof (IPX7 rated or higher) medical alert transmitter or fall-detection pendant into the tub or shower stall?
- Post-Bath Drying Ergonomics: Is there a seated staging area outside the shower to dry off and dress without balancing on one foot? (Review: How to Dry Off Safely After a Shower and How to Dress Safely After Showering)
🛒 Recommended Fix: Waterproof Bathroom Alert System
Product Pick: Waterproof Senior Wireless Caregiver Pager & Call System
- Key Specs: IP55/IPX7 waterproof transmitter button, 500-foot operating range, audible chime receiver with 5 volume settings and visual LED strobe alert.
- Why It Matters: Most standard smart home devices fail when exposed directly to shower moisture. A dedicated waterproof call button provides immediate notification if an individual cannot rise from the floor.→ Check Current Pricing on Wireless Pagers
Bathroom Safety Upgrade Cost Breakdown (DIY vs. Pro)
Understanding estimated costs helps prioritize immediate safety equipment versus long-term construction projects:
| Bathroom Safety Modification | Estimated DIY Equipment Cost | Professional Installation Cost | Fall Protection Impact |
| Stud-Mounted Grab Bars (Pair) | $30 – $60 | $150 – $250 | Critical / Highest |
| Heavy-Duty Padded Shower Bench | $45 – $95 | $0 (No installation needed) | Critical / Highest |
| Toilet Safety Frame / Rails | $35 – $70 | $0 (Self-installed in 15 mins) | High |
| Long-Hose Handheld Shower Wand | $25 – $50 | $50 – $100 (Optional handyman) | Medium-High |
| Plug-in LED Motion Night Lights (2-Pack) | $15 – $25 | $0 (Plug into wall outlet) | Medium |
| Curbless Roll-In Shower Conversion | N/A | $3,500 – $10,000+ | Long-term High Impact |
How to Fund & Offset Modification Costs
Basic hardware adjustments (such as grab bars, non-slip runners, and shower transfer benches) can typically be purchased out of pocket for under $250. However, if your home audit reveals the need for larger structural renovations—such as widening doorways to 36 inches or converting a high-step tub to a curbless walk-in shower—financial assistance may be available.
While traditional Original Medicare (Part A and Part B) does not pay for structural real estate changes, alternative funding programs frequently offset or fully fund these installations:
- Medicare Advantage (Part C): Select plans offer Special Supplemental Benefits for the Chronically Ill (SSBCI) that cover safety hardware and environmental home adaptations.
- Medicaid HCBS Waivers: Home and Community-Based Services waivers often pay directly for curbless conversions and wall-mounted grab bar installations to avoid nursing home placement.
- VA HISA Grants: Eligible military veterans can receive up to $6,800 under the Home Improvements and Structural Alterations grant for accessible shower entries and handrails.
- USDA Section 504 Grants: Low-income rural homeowners aged 62 and older can secure up to $10,000 in non-repayable grants to remove environmental safety hazards.
Need assistance navigating funding?
Read our full financial breakdown:Does Medicare Pay for Bathroom Modifications? Real Coverage Rules & Alternative Grants
Frequently Asked Questions
How often should a senior bathroom safety audit be performed?
An audit should be conducted at least once every 6 months. Additionally, re-evaluate the space immediately following any surgery, changes in medication that impact balance or blood pressure, or after any minor slip or balance stumble.
Are suction-cup grab bars safe for seniors?
No. Suction-cup grab bars rely entirely on surface airtightness against smooth tile. Over time, steam, grout lines, micro-textures, and temperature shifts cause suction seals to degrade without visual warning. When subjected to sudden body weight during a slip, they often pull free from the wall. Always install grab bars that are mechanically fastened into wooden wall framing studs with structural screws.
What is the single most dangerous zone in a residential bathroom?
The transition zone over the tub threshold or shower curb accounts for the highest volume of severe bathroom injuries. Stepping over a 14-to-18-inch obstacle while wet, barefoot, and bearing full weight on one leg significantly destabilizes balance.
Do grab bars need to be installed strictly horizontally?
No. ADA guidelines and occupational therapy best practices often call for a combination of horizontal and vertical bars: a vertical grab bar installed at the entryway frame aids balance while stepping over the curb, while horizontal or angled bars along the side wall support sit-to-stand transitions and seated positioning.
Final Inspection Step
Reading about fall hazards does not prevent accidents—systematically inspecting your home and correcting vulnerabilities does. Once you have completed this safety audit, evaluate your budget and explore estimated senior bathroom remodel costs to plan affordable upgrades or complete overhauls.
Print out our free one-page inspection sheet, grab a pen, step into the bathroom, and run through the checklist today to ensure every transition point is stable and secure.
📥 Click Here to Download The Free Printable Bathroom Safety Checklist (PDF)

3 Comments