

How to Stop a Shower Chair from Slipping and Tipping Over (Safe Setup Tips)
Reviewed for Accuracy | Follows Aging-in-Place & Home Mobility Safety Guidelines
To stop a shower chair from slipping or tipping, implement four critical adjustments:
- Strip soap scum and biofilm: Clean the contact surface with isopropyl alcohol or white vinegar to expose the bare floor.
- Avoid grout lines entirely: Seat rubber feet fully on smooth tile surfaces to prevent broken vacuum seals.
- Compensate for the drain slope: Adjust individual leg extension notches to level the seat against the standard 2° to 4° basin decline.
- Keep center of gravity aligned: Sit with knees at a 90-degree angle and push up using wall-mounted grab bars rather than shifting sideways.
Table of Contents
Why Do Shower Chairs Slide and Tip? (The 4 Root Causes)
Most guides recommend buying a rubber mat without addressing why stability fails in the first place. Understanding the root cause helps you fix the problem permanently instead of masking it temporarily with generic senior bathroom safety modifications. Resolving instability permanently requires targeting the specific mechanical or environmental breakdown:
1. Soap Scum, Hard Water, and Biofilm Buildup
Over time, bath products, skin oils, and water minerals create a microscopic barrier over shower floors. This slick biofilm isolates the chair’s rubber feet from the tile. Even commercial-grade rubber cannot generate traction or suction on an oily surface film.
2. Uneven Basin Slopes and Grout Traps
Residential shower pans and bathtubs slope between 2° and 4° toward the drain for drainage. Setting all four chair legs to the identical notch forces the downhill legs to bear less weight, turning the chair into an unstable pivot. Additionally, wide grout lines break the suction seal on vacuum-style feet, causing unexpected slippage.
3. Symmetrical Leg Adjustments
Adjustable aluminum legs feature numbered height detents. Relying on matching numbers on all four sides ignores basin contours. When one foot doesn’t make full contact under dynamic load, lateral shifts can tip the frame.
4. Lateral Weight Transfer & Center of Gravity Shifts
A securely balanced chair will still tip if the user twists sideways, reaches outside the base of support for soap, or pushes down unevenly on an armrest while standing. Biomechanical imbalances create lateral torque that standard four-point bases cannot counter without structural assistance. Even with non-slip rubber feet installed, leaning forward to reach your toes shifts your center of gravity. Instead of risking a tip, use bend-free bathing aids to clean hard-to-reach areas from a seated position.
Eliminate reaching and twisting while seated by installing an accessible handheld shower sprayer for shower chairs.
Step-by-Step: How to Make Your Shower Chair 100% Stable
Follow these steps sequentially to configure your shower chair for maximum load-bearing stability:
Step 1: Prep and Degrease the Shower Floor
- Spray the designated seating area with a 1:1 mixture of warm water and white distilled vinegar, or wipe down with 70% isopropyl alcohol.
- Allow the solution to penetrate soap deposits for 3 minutes. Degreasing is the single most critical step to fix a slippery bathroom floor for elderly safety before setting down rubber feet.
- Scrub the surface using a stiff-bristled, non-abrasive brush, then rinse with hot water.
- Dry the area completely before initial placement to verify direct rubber-to-surface contact.
A secure chair provides the stable base seniors need not just for washing, but also for drying off safely without standing.
Step 2: Choose and Position the Foot Type
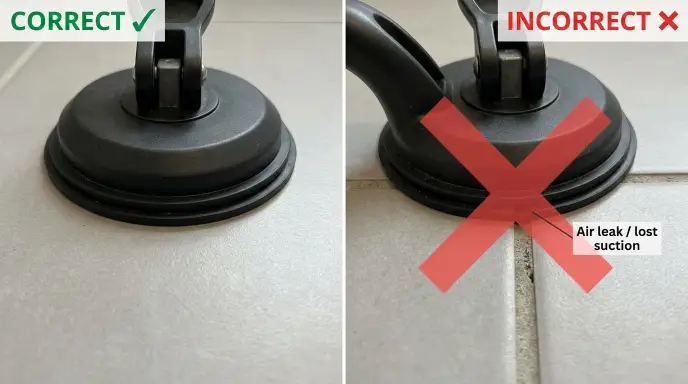
Match the chair feet to your specific floor material:
| Foot Mechanism | Recommended Surface | Retention Type | Slipping Hazard |
| Wide Suction Cups | Flat, glazed ceramic tiles & smooth acrylic tubs | Vacuum seal | High over grout lines; near-zero on smooth flat tile |
| Non-Skid Rubber Ferrules | Textured stone, mosaic tile, sloped shower pans | Dynamic friction | Low on degreased tile; fails on oily soap buildup |
| Rubber Bath Mat Layer | Worn, slippery fiberglass tubs | Surface friction | Severe hazard if placed directly under suction feet |
Positioning rule: Ensure all feet rest entirely on flat tile. Never allow the edge of a rubber foot or suction rim to overlap a grout groove.
Step 3: Level the Legs to Compensate for Drain Pitch
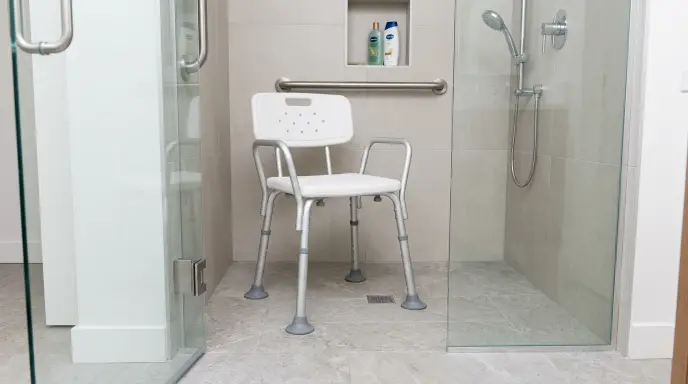
- Place the shower chair in its designated bathing position.
- Set a spirit or bubble level across the center of the seat.
- Keep the front downhill legs set to the baseline height, and extend the uphill rear legs by 1 or 2 notches until the bubble rests precisely between the center lines.
- Press firmly down on each corner with both hands; if any corner wobbles, adjust that leg independently.
Bathtubs and shower pans are engineered with a 2° to 4° slope toward the drain to stop water pooling on the bathroom floor; adjusting individual leg heights compensates for this required decline.
Step 4: Apply the 90-Degree Knee Rule
Adjust seat height so that when seated upright:
- Both feet rest flat on the shower floor.
- Hips and knees form an exact 90-degree angle.
- Why it matters: A seat positioned too low forces excessive forward leaning to stand, kicking the rear legs upward. A seat set too high causes the user to slide forward off the front lip, pitching the entire chair downward.
Accessories to Reinforce Shower Chair Stability
Heavy-Duty Non-Slip Shower Liners
A dedicated non-slip shower mat adds friction on slick fiberglass pans, provided it is a single, flat, industrial-grade sheet. Never place suction-style chair feet on top of a shower mat. Stacking suction cups on soft vinyl creates a spongy, shifting foundation that dramatically increases rollover risk. Instead, position suction cups directly on the bare tub floor, or use non-suction friction feet over a flat mat.
Upgraded Wide-Base Replacement Feet
Original equipment manufacturer (OEM) rubber tips are frequently narrow (1.5 inches or less). Swapping standard tips for medical-grade universal replacement feet with a 2.5- to 3-inch flared profile broadens the chair’s footprint, redistributing the center of mass over a larger surface area. Instead, follow proper walk-in shower grab bar placement rules and mount ADA-compliant bars within arm’s reach to eliminate frame torque.
Wall-Mounted Grab Bars for Bilateral Support
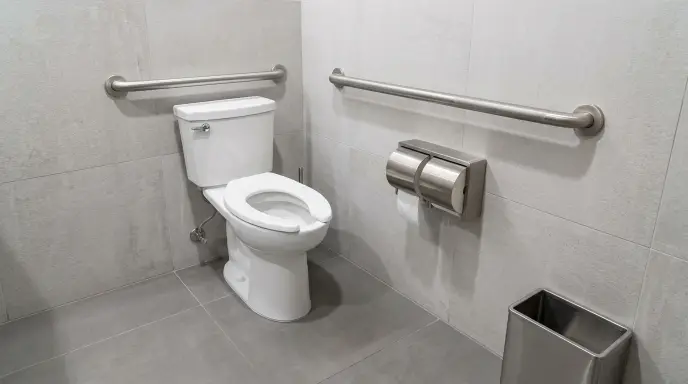
Do not rely on removable shower chair armrests as primary standing levers. Uneven downward pressure on one armrest creates severe rotational torque. Install ADA-compliant, wall-mounted grab bars at a 45-degree angle or horizontal alignment within immediate reach, keeping lateral force off the chair frame entirely.
Critical Safe Transfer Techniques: Preventing Tips When Sitting & Standing

Equipment stability is only half the equation; safe biomechanics eliminate tipping hazards during movement:
- Back-of-Knees Rule: Back up until the edge of the seat touches the back of both calves before attempting to sit. Lower the body gradually using core strength and wall grab bars rather than dropping onto the chair.
- Centered Mass Alignment: Always sit in the absolute center of the seat plate. Avoid perching on the front lip or leaning heavily over the side to retrieve toiletries.
- Dual-Point Push Technique: Never push off a single armrest. If wall bars are not available, place both hands evenly on both armrests simultaneously to maintain equal bilateral downward force.
Red Flags: When to Retire and Replace Your Shower Chair
Regularly inspect your mobility equipment. Retire the chair immediately if you observe:
- Dry Rot on Feet: Rubber that feels hardened, cracked, brittle, or slick rather than grippy and pliable.
- Loose Structural Rivets: Aluminum legs that wobble inside the frame receiver tubes even when push-pins are fully clicked into place.
- Stress Fractures: Cracks around the molded drainage holes in plastic seats or bending along cross-braces.
- Weight Limit Mismatches: Standard models support up to 300 lbs. If user weight approaches or exceeds this limit, transition immediately to a heavy-duty bariatric model rated for 500 lbs to avoid catastrophic structural failure.
If adjusting your chair still fails to give you full stability inside a deep tub, consider switching to a wider base—read our comparison of a shower chair vs transfer bench for bathtubs to find the safer option.
Frequently Asked Questions
Can I use a shower chair on a textured tile floor?
Yes, but you must use standard non-skid rubber ferrule tips rather than suction cups. Suction cups require an airtight seal that textured, pebbled, or slate tiles break. Friction-based rubber tips rely on body weight and clean contact to stay firmly in place.
Is it better to put a mat under the shower chair?
Only if the chair utilizes standard rubber tips on an exceptionally slick surface. Never use a mat beneath suction-cup feet. Layering suction cups onto a mat prevents them from sealing to the floor and creates an unstable, shifting base.
How often should I clean the rubber feet on the chair?
Clean both the rubber feet and the shower floor once a week. Mildew, soap scum, and hair accumulate around rubber rims rapidly, silently eliminating traction even when the rubber shows no visible damage.
Why does my shower chair rock even though all legs are set to the same number?
Bathtubs and shower pans are engineered with a 2° to 4° slope toward the drain for drainage. Equal leg extension numbers assume a completely level floor; adjusting the legs to different heights is necessary to counteract the slope of the basin.
Disclaimer: This article provides general home safety guidance and is not a substitute for clinical medical evaluation. For individual balance assessments, personalized fall-risk reduction, or specialized mobility prescriptions, consult a licensed physical or occupational therapist.



10 Comments