

How to Keep a Bathroom Floor Dry After a Shower to Prevent Dangerous Senior Falls
This article provides general safety information and is not a substitute for professional medical advice. If you or a loved one has mobility limitations, please consult a physical or occupational therapist for guidance tailored to your specific situation.
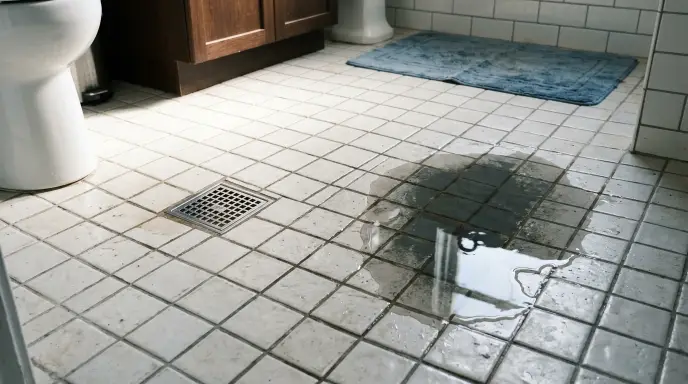
If you’ve ever watched an older parent shuffle across a wet bathroom floor in socks, you already know the fear. It’s not abstract. According to the CDC, more than one in four adults aged 65 and older falls each year, and bathrooms — thanks to hard tile, standing water, and slick surfaces — are one of the most common places it happens.
The good news? Most of this risk comes down to one simple factor: how long your floor stays wet after a shower. Fix that, and you eliminate the majority of the danger. To trap excess drips right as you step out of the stall, place ultra-absorbent bathroom rugs for older adults that dry quickly and won’t bunch up underfoot. While keeping the tiles dry is critical, doing a full audit using our printable senior bathroom safety checklist helps identify hidden drainage and slip hazards before an accident happens.
Below, we’ll walk through the fastest ways to dry your bathroom floor today, followed by longer-term upgrades if you want a permanent fix.
Table of Contents
Start Here: The Fastest Ways to Dry Your Floor Today
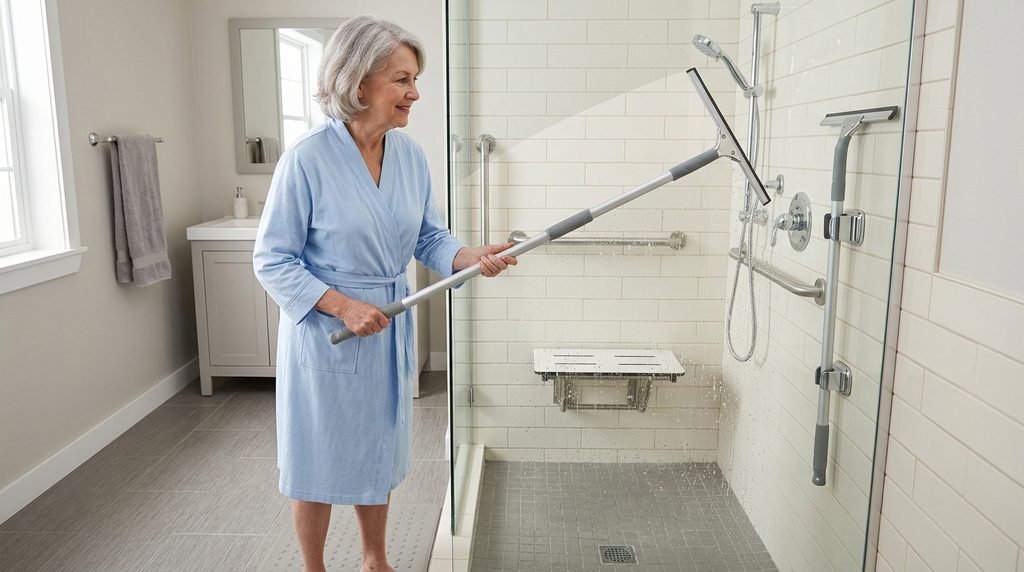
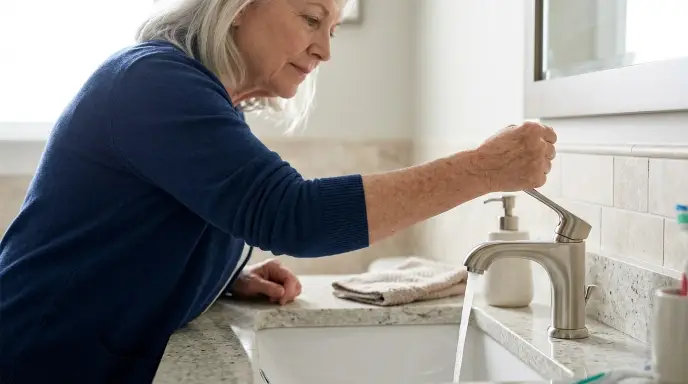
You don’t need to renovate your bathroom to make it safer this week. These three methods cost little to nothing and can be put into practice immediately. Water pooling around the base of the cabinet often starts with poor spout reach; installing senior-friendly gooseneck faucets reduces counter splashing that spills over onto the tile
Use a Long-Handled Squeegee
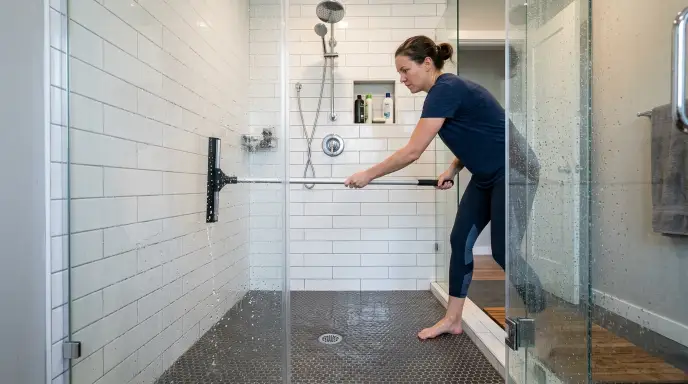
This is the single most effective habit you can build, and it takes about 15 seconds.
After showering, run a squeegee across the shower walls and floor before stepping out. For seniors with limited mobility or difficulty bending, look for a squeegee with an extended handle — this lets you clear water without crouching or reaching awkwardly. If you find that squeegeeing or using high-absorbency mats still leaves stubborn puddles near the drain or baseboards, the issue is likely structural rather than routine. Learn how to diagnose and stop water pooling on your bathroom floor by identifying sunken tiles or faulty shower slopes before permanent subfloor damage sets in. Even with consistent squeegeeing and drying routines, high-gloss glazed surfaces present an immediate hazard the moment moisture touches them. If you are planning an upgrade, consider installing senior-safe bathroom flooring options that retain high traction even when wet.
Quick tip: Mount the squeegee on a hook right inside the shower. If it’s not within arm’s reach, it won’t get used consistently.
Time Your Ventilation Strategically
Most people turn the exhaust fan on during the shower, and off the moment they’re done. That’s backwards.
Humidity peaks right after the water shuts off, which is exactly when the floor starts to dry — or doesn’t. Leave the fan running for at least 20-30 minutes after your shower, and if your bathroom has a window, crack it open too. This one adjustment can dramatically cut down drying time.
Do a Quick Towel Pass on the Floor
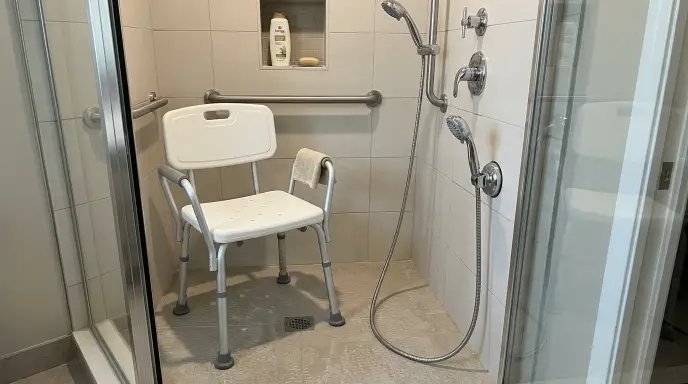
A bath towel or dedicated floor towel run across the tile right after stepping out removes the surface water that mats and squeegees miss — especially near the shower threshold, where most puddling happens. While towel drying near the shower exit, seniors should always have access to a sturdy wall handle. Learn the best grab bar placement near shower exits to prevent off-balance reaches. Preventing standing puddles starts before stepping out of the tub. By practicing a safe seated drying routine inside the enclosure, you keep the majority of the water from ever hitting the bathroom floor.
📦 Why Does the Floor Stay Wet in the First Place?
It comes down to two things: tile porosity and evaporation rate. Glazed tile sheds water quickly, but unglazed or textured tile (often chosen because it’s slip-resistant) tends to hold moisture longer. Combine that with poor bathroom ventilation, and water can sit on the surface for 20+ minutes after a shower — plenty of time for someone to walk across it. Understanding this is helpful, but the fixes above matter more than the science itself. Wet tile is only half the problem — a floor that stays slick even after drying is its own risk. See our guide on how to fix a slippery bathroom floor for elderly safety without retiling
The Right Bath Mats: Absorbent vs. Non-Skid

Not all bath mats are created equal, and this is where a lot of people get it wrong. A soft, plush mat might feel nice underfoot, but if it doesn’t grip the floor or absorb water fast enough, it’s not actually doing its job. Hand-washing and morning grooming routines can leave water trails in front of the vanity. Pair good drying habits with a safety-focused bathroom sink and vanity station.
What to Actually Look for on the Label
Unlike flooring materials, bath mats aren’t rated using DCOF (that measurement applies to hard surfaces like tile, not fabric or foam mats). Instead, look for these indicators when shopping:
- TPU or latex non-skid backing — this is what actually keeps a mat from sliding on wet tile
- NSF (National Sanitation Foundation) certification — some bath mats carry this for hygiene and slip-resistance testing
- Suction-cup grip bottoms — common on rubber and PVC mats; these create a stronger hold than backing alone
If a mat’s packaging only advertises “non-slip” without specifying the backing material, treat that as a marketing claim rather than a verified standard.
Comparing Mat Materials
| Material | Pros | Cons | Best For |
|---|---|---|---|
| Diatomite Stone | Absorbs water almost instantly, quick drying | Can crack if dropped; rigid, not cushioned | Wet shower exits where fast evaporation is crucial |
| Rubber-Backed Microfiber | Machine washable, comfortable underfoot | Requires regular laundering to maintain grip | Daily use in multi-generational households |
| Textured Rubber / PVC | Excellent floor grip, heavy-duty drainage holes | Less cushioned, more clinical look | High-traffic bathrooms and walk-in showers |
Where to Actually Place Mats
Most people only put a mat outside the shower. That’s a start, but not enough. For a senior’s bathroom, consider placing mats:
- Directly outside the shower or tub
- In front of the sink/vanity (toothbrushing splashes add up)
- Near the toilet, especially if it’s close to the shower area
Maintenance note: A wet mat left on the floor for hours becomes its own hazard—mold, mildew, and a slip risk. Hang mats to dry after use, and replace worn rubber or TPU backing every 6-12 months, since it degrades faster than people expect.
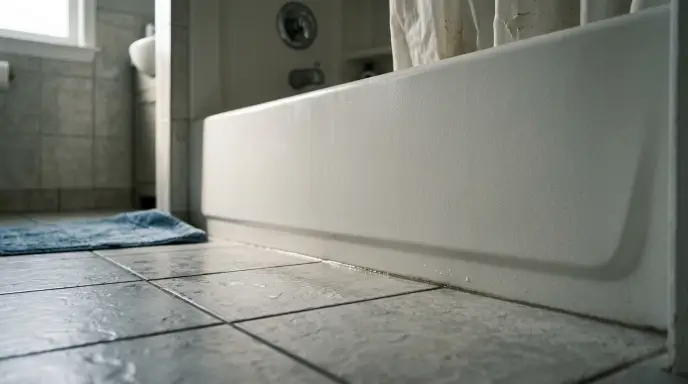
Preventing post-shower puddle slips starts at the doorway design; consider the water-containment trade-offs of curbless showers before remodeling.
Moisture Control: Fans, Dehumidifiers, and Airflow
If your bathroom stays humid long after a shower, no towel or squeegee routine will fully solve the problem. This is where ventilation upgrades come in.
How to Calculate the Right Exhaust Fan Size
Bathroom fans are rated in CFM (cubic feet per minute), and an undersized fan simply won’t move enough air to dry the room effectively.
Simple formula: Multiply your bathroom’s square footage by 1.1 to get the minimum CFM you need.
Example: A 50 sq ft bathroom needs a fan rated for at least 55 CFM.
If your current fan feels weak or the mirror stays fogged long after your shower, it’s worth checking its rating against this formula.
Dehumidifiers vs. Smart Humidity Sensors
For bathrooms without windows or with chronic moisture issues, a small dehumidifier can help — though it’s an added appliance to maintain. Some newer exhaust fans come with built-in humidity sensors that automatically turn on when moisture levels rise and shut off once the air clears. This hands-off approach can be especially helpful if remembering to flip a fan switch isn’t realistic for the household.
If you’re planning a larger renovation — new flooring, a curbless shower, or a full accessibility remodel — our aging-in-place bathroom guide covers the full cost breakdown and design specs in detail.
Permanent Flooring Fixes (If You’re Ready to Upgrade)
If you’re renovating or building a bathroom with safety in mind, flooring choice matters more than almost anything else — and this is where slip-resistance ratings actually apply.
Understanding the DCOF Standard
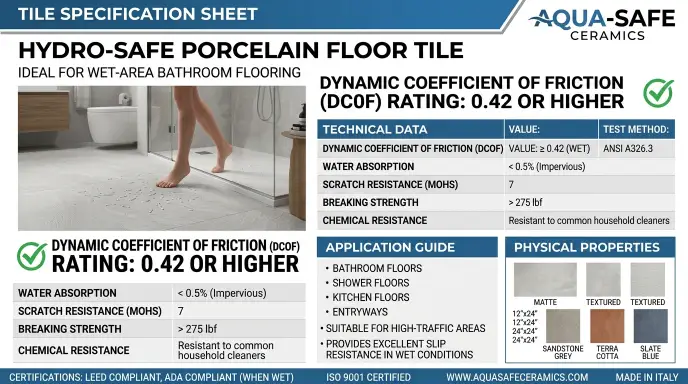
The Dynamic Coefficient of Friction (DCOF) measures how slip-resistant a hard flooring surface is when wet. This rating is tested under the ANSI A326.3 standard, set by the American National Standards Institute and the Tile Council of North America — and it’s commonly referenced in guidelines under the Americans with Disabilities Act (ADA) for accessible, wet-area flooring.
For bathroom floors, look for a DCOF rating of 0.42 or higher when selecting tile, vinyl, or stone flooring. This number will typically be listed on the manufacturer’s spec sheet — it’s a far more reliable indicator than marketing terms like “slip-resistant.”
Textured porcelain tile, certain vinyl products, and rubber flooring tend to meet or exceed this standard, while polished stone or glossy tile often falls short — even if it looks elegant in a showroom.
Anti-Slip Coatings and Treatments
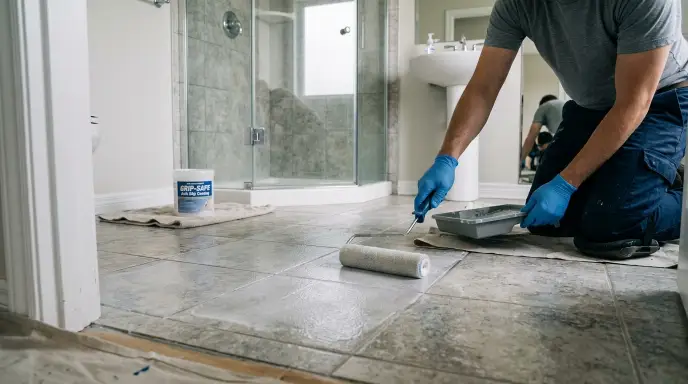
If replacing the entire floor isn’t in the budget, anti-slip coating treatments can be applied to existing tile. These create a microscopic texture that improves grip without changing the floor’s appearance. Some homeowners handle this as a DIY project with a store-bought kit; others hire a flooring specialist for a more durable result.
Cost for professional application typically varies based on square footage and local labor rates — get a few local quotes rather than relying on national averages, since pricing differs significantly by region.
Bathroom Safety for Different Mobility Needs
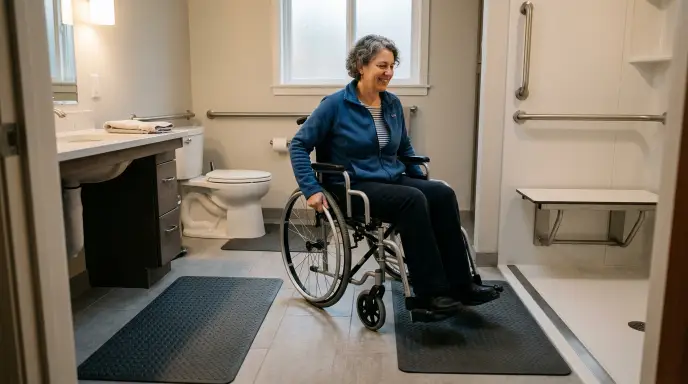
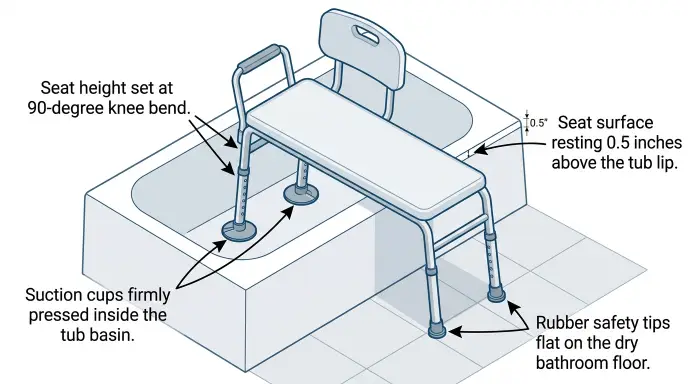
Not every senior’s situation looks the same, and a lot of general advice misses this. Here’s how floor-drying strategy shifts depending on mobility level. If you use seated mobility equipment in the tub, apply our simple curtain tuck method for transfer benches to stop spray from reaching the floor.
For Wheelchair or Walker Users
Standing water is more dangerous here because wheels and cane/walker tips can slip on wet tile just as easily as bare feet. If the bathroom has a roll-in shower, consider a floor squeegee with a wide head to clear water across the entire wet zone quickly, and make sure any mats used have a low profile so they don’t create a tripping edge for wheels or walker legs.
For Renters Who Can’t Renovate

If you’re renting, you likely can’t rip out tile or install a new exhaust fan — but you still have options:
- High-quality, removable non-skid mats (no installation required)
- Portable dehumidifiers that don’t require permanent fixtures
- Requesting reasonable accommodations from your landlord, which may be protected depending on your situation
For questions about tenant rights regarding accessibility modifications, the Fair Housing Act may provide relevant protections — check with your local housing authority or HUD.gov for specifics, as this varies by state and circumstance.
What It Actually Costs to Fix This

Budget matters, so here’s a realistic breakdown based on typical price ranges.
| Solution Tier | Estimated Cost | DIY or Professional? | Inclusions |
|---|---|---|---|
| Budget | $0 – $50 | DIY | Long-handled squeegee, floor towels, non-skid bath mat |
| Mid-Range | $50 – $300 | Mostly DIY | Diatomite stone mats, portable dehumidifier, upgraded exhaust fan |
| Permanent Upgrades | $300+ | Professional Recommended | Anti-slip tile coatings, textured flooring replacement, humidity-sensing ventilation |
Prices are general estimates and will vary based on your location, product brand, and contractor rates.
Your Bathroom Drying Checklist
Print this out or save it to your phone — small consistent habits make the biggest difference.
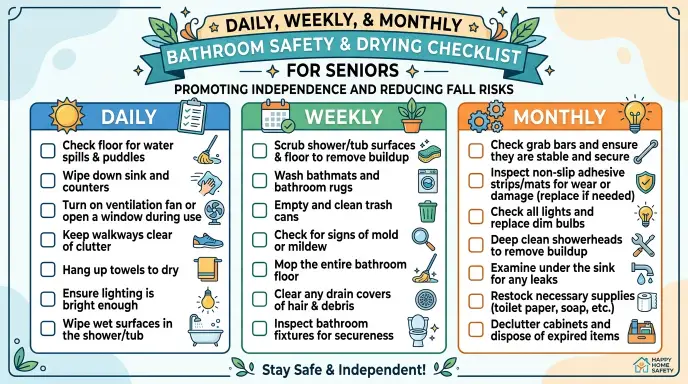
Daily:
- Squeegee shower walls/floor after each use
- Run exhaust fan for 20-30 min post-shower
- Wipe down floor near shower exit
Weekly:
- Wash and fully dry bath mats
- Check mat edges for curling (trip hazard)
Monthly:
- Inspect grout lines for cracks or gaps
- Clean exhaust fan vent cover (dust buildup reduces airflow)
- Check caulking around tub/shower for water seepage
Mistakes That Undo All Your Hard Work
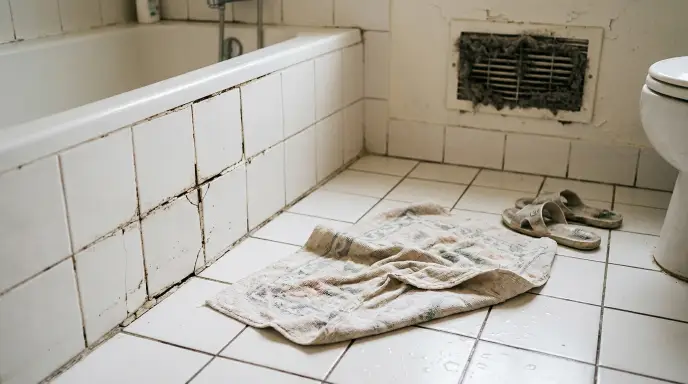
A few common habits quietly cancel out even the best drying routine:
- Using a regular bathroom rug instead of a mat with verified non-skid backing. It might look fine, but without proper grip on the bottom, it can slide out from underfoot. If you are using a transfer bench for bathtub safety, split curtain liners or proper drape techniques are essential to stop water from escaping onto surrounding floors.
- Ignoring cracked grout. Water seeps underneath, stays trapped, and keeps the surface damp longer than it should be.
- Letting dust clog the exhaust fan. A fan running at reduced capacity won’t clear humidity effectively, even if it sounds like it’s working.
- Skipping nighttime lighting. A perfectly dry floor doesn’t help much if someone can’t see it clearly at 2 a.m. Motion-activated night lights are a simple add-on worth considering.
A Note on Broader Bathroom Safety
Keeping the floor dry solves a huge piece of the fall-risk puzzle, but it’s not the only piece. Grab bar placement, adequate lighting, and emergency response tools all play a role in a fully fall-proofed bathroom.
If you’d like a complete, room-by-room safety strategy, check out our full guide: Bathroom Safety for Seniors: The Complete Fall Prevention Checklist →
Frequently Asked Questions
How long does it take for a bathroom floor to dry naturally?
This depends on tile type, humidity, and ventilation, but unglazed or textured tile in a poorly ventilated bathroom can stay wet for 20 minutes or longer without intervention.
What’s the best non-slip mat for elderly bathroom safety?
Look for a mat with TPU or latex non-skid backing, or NSF certification where available. Rubber and diatomite stone options with a low-profile edge tend to perform best while avoiding trip hazards.
Can I install anti-slip flooring myself?
Coating treatments can often be applied as a DIY project. Full tile replacement is generally best left to a professional to ensure proper slope and drainage.
What CFM fan do I need for my bathroom?
Multiply your bathroom’s square footage by 1.1. A 60 sq ft bathroom, for example, needs a fan rated for at least 66 CFM.
How often should I replace bathroom mats?
Check the backing every 6-12 months for wear. If the mat no longer grips the floor firmly or shows fraying, it’s time to replace it.
What does DCOF mean, and does it apply to bath mats?
DCOF (Dynamic Coefficient of Friction) measures slip resistance on hard flooring surfaces like tile or vinyl, tested under the ANSI A326.3 standard. It does not apply to fabric or foam bath mats — for those, non-skid backing material is the relevant factor.
Editorial Standards
This article was written using publicly available data from the CDC and industry flooring standards set by ANSI/TCNA, as referenced in ADA accessibility guidelines. It was reviewed by Janet Reyes, an Occupational Therapist and Certified Aging-in-Place Specialist, for accuracy and practical relevance.
We update this guide periodically to reflect current product standards and safety recommendations.
This post may contain affiliate links. We only recommend products we’ve researched and believe offer genuine value — any commission earned comes at no additional cost to you.
Quick-Start Action Plan:
- Mount a long-handled squeegee inside your shower today
- Extend your exhaust fan’s run-time by 20 minutes after each shower
- Check your current bath mat’s backing — if it slides at all, replace it this week
Small changes, done consistently, are what actually prevent falls — not a single big renovation. Start with what’s realistic for your household, and build from there. Understanding the water containment differences between walk-in tubs and walk-in showers can help you choose the right splash guards, curtains, or drainage pitch for your floor. If you struggle with water pooling around curtain edges, read our breakdown of shower enclosure safety for older adults to see if weighted liners or glass panels work best.

10 Comments